Monday, March 12, 2018

Sometimes We All Need Change

It's been a few years since I began my blogging journey, and quite frankly, I've been sorely lacking. I've had several people express their interest in following me and the quirkiness that is my life if I were to (finally!) keep up with a blog, so here we go. 

I've learned a lot over this journey, but most of all I've learned that eventually we all need change. Looking over my previous work, I KNOW I can do better! I'll always have a special place in my heart for what Domestic Mommies was, but the woman that started that blog is not the same woman writing this now; and I feel that my online presence should reflect that. Southern Sass and Sweet Tea gives me the space I need to grow and change. Bear with me as we take this journey together. I'm learning; and that's something I'll never stop doing.

I'll be leaving this blog up for posterity sake, but all new posts will be found at Southern Sass and Sweet Tea. Please check it out, it's going to be one heck of an adventure. 

Thank you, for everything...
Jess 


Wednesday, January 11, 2017

Far Too Long

Oh wow...I didn't realize that it had been so long since I had posted on here! I'm still here, just had a lot of life changes in a short amount of time. My husband took a new job, so that's been pretty hard to get used to, especially since he had been at the last one for a little over 10 years. He still doesn't have a set in stone schedule, so cooking and crafting on a regular basis have been put to the wayside as of late. I'm sincerely hoping that I can get back on a regular schedule as soon as the youngest starts school. Fingers crossed that should be in September.

I do have a sizeable kitchen make-over project planned within the next couple of months (and doing it on a budget) so I hope to have tons of pictures and ideas to toss onto the internet soon.

My last piece of news, and the one that I really didn't want to have to post, but it has had such an effect on my family's lives, is a sad one. My grandmother was diagnosed with Stage IV Metastatic Breast Cancer. It is uncureable. She is being treated and will be for the rest of her life. They gave her 2 years. We are spending as much time as possible with her and making every day she has left count, whether it be the 2 years they gave her, or another 10 or more. I don't know what else to say about it. It hurts to even think about.

I just wanted everyone to know that I am still here and still have things to post and do, just give me time.

Much Love!

Sunday, December 6, 2015

On Being Thankful...for my best friends

Friends are our chosen family. Yes, I joke and kid about not having any, but when it comes down to it, I am very, very blessed in the friend department. I have friends from all walks of life. You name a character trait and I can pick some one with it. I have friends that can make me laugh, make me cry, make me scratch my head and ask, "wtf are you doing?" (and sometimes all within 5 minutes). And for all of them, I am eternally grateful. Life just wouldn't be as awesome as it is without all of you!

But sometimes, just sometimes, you find those friends that go the distance. Those friends that are something more. Those that become such an integral part of your life that the bond with them will withstand anything, and that you know would follow you to the end of the earth and back without a second thought. And once they've walked into your life, you know, beyond a shadow of a doubt, that you'll never be able to let them walk back out of it.

I am very blessed to have not one, but two friends like that. Don and Heather are the most wonderful, most kind-hearted, most amazing people I've ever had the pleasure of meeting outside of TD and the kids. I know I could trust them with my life, my family, my everything, and they would rise to the challenge. And I know I don't let them know it nearly often enough.

I met Don through a church function. Though he is old enough to be my father, we hit it off well and held a lot of similar beliefs. This, of course, led to conversations of a spiritual nature, that eventually made way into conversations about anything and everything under the sun. And there was no greater honor than when he approached me and asked me to help him get a church underway. I jumped headfirst into new territory, took a leap of faith, and came out on the other side all the better for it. While I view him as a mentor, I also view him as a brother, a friend, and a voice of wisdom and reason. And while we've had our share of disagreements, we've never let it come between us. I may pick on and sass him just as much as I do TD, but I hope that he knows how much I care and how much I value his presence in my life.

Heather I met through a Facebook gaming page. She had mentioned the town that she lived in and lo and behold if it wasn't the same teeny-tiny town that I live in as well. Call it fate, destiny, whatever, but I sent her a friend request and went from there. Even though she bounced around a bit before I finally got to meet her, when I did, it was like everything in the world clicked into place. She has become my very best friend, in every sense of the word. There is absolutely nothing we don't share with each other and no such thing as TMI between us. I never, ever thought I'd find a friend that I could consider a sister, but she's there. She has a piece of my soul forever.

I know I don't tell you guys near often enough how thankful I am to have you in my life, so hopefully writing this blog lets you know. I don't know what I would do without either of you.

Thank you. For everything.

Tuesday, December 1, 2015

On Being Thankful...for my Spouse

Yes, yes, I know. Thanksgiving was last week, and I'm sure you've seen plenty of blogs outlining thankfulness. I'm a little late to the party, Then again, every day is a day to be thankful.

Yesterday, something hit me (while folding TD's underwear of all times). I don't show how thankful I am nearly often enough. And while I am thankful for many, many things (an am planning on doing a series of these posts in the coming weeks), today I'm talking solely about the one person that I am thankful for above all others.

So anyway, while folding hubby's underwear, I realized that far too often that I forget to tell him just how thankful I am for him. It's not that I'm an ungrateful bitch, just that I'm so ridiculously busy with the kids, their activities, my activities, TD's activities, and running this house that it just slips my mind.

But no more. 

From now on, I want to make an effort to show and tell not only TD, but everyone in my life that I am thankful for them and all that they do for me.

TD, bless him, drew my attention to the fact that my driver's side front tire is pretty much shot. As in the wires are exposed and I'm now, quite honestly, terrified to drive on it. He took it upon himself to call and order my tires, drop off Maggie (that would be my car), get her inspected, and change my oil, all within 2 days of finding that my tire was bad. He didn't leave that to me, didn't leave me lost in trying to figure out just what to do.

He is the best damn husband and father I could have ever imagined, and more. Though he's not always here, he's always taking care of us. That man works harder than anyone I've ever seen in my life. And no matter how down and out we are, he always finds a way to pull through. He's always present for the major events in the kids lives and makes an effort to spend one-on-one time with them daily. While he may not be the most gentle, romantic or affection man on the planet, I've never once doubted how much he loves me. He just has his own unique way of showing it.

He even helps around the house, even if I've told him to sit down and chill. Of course, yes, I do the majority of stuff around here. That's my job being a SAHM, and I love every minute of it, but without him standing beside me and supporting me, I'd never get it all done. He understands that my work isn't easy and that I don't get a break, and he does attempt to make it simpler on me, even if it is in small ways. He always tells me in advance that he's got something going on so that I can schedule it. He calls if he's going to be late getting home so that I know to put off supper for an hour or so. He reminds me to grab my purse or my glasses, or diaper wipes.

So yeah, while I might pick on him about not putting his dirty clothes in the basket and have an unconventional way of showing love (ie, affectionately calling him assface or popping him on the butt with the corner of my wet dishcloth), I hope that he knows and understands that for everything he does, big or small, I am eternally grateful and that I love him with every beat of my heart.

Sunday, November 1, 2015

Product Review: Borden Good2gether Snacks

So a few weeks ago I joined on with Bzzagent (I'll talk more about them in a future post), but in short, I receive products for free in exchange for unbiased reviews.

My first Campaign was for Borden Good2Gether snacks. These nifty little refrigerated packages are available for less than $2.00 at your local Walmart, stocked with the other cheese snack products in the dairy case. They are individual serving sizes of cheese cubes and pretzels, available in both Colby Jack and Mild Cheddar. I used my coupon for the mild cheddar flavor. The cheese was the high quality that I expected from Borden, and had a smooth cheddar flavor with no hint of sharpness. It was very smooth and enjoyed all around by my family. Truthfully, I was a little iffy about the pretzels, seeing as they were refrigerated, but they were crisp and crunchy and had just the perfect amount of salt.  


The package was easily opened by my 6 year old, making it perfect for in the car, or a lunchbox treat. I feel so good being able to give my kids a snack that isn't chock full of sugar and junk, and that they actually enjoy. These will definitely be bought again! 

Final Rating: 5/5. 

Wednesday, October 28, 2015

Needing to Get Back on Track

Holy cow has my life been a jumble of chaos recently! I need self discipline. I think this blog may be a good way to do that. I really need to carve out time to write here. Its my release. My own little corner of the web that's just mine.

I deal with all things mommy. The downside to that is that there just aren't enough hours in the day. Maybe I can start getting up a little earlier on Fridays. Even 30 minutes with my phone or laptop is enough to get what's in my mind on the page.

Here's to hoping...nay, DOING. Wish me luck.

Sunday, September 1, 2013

Mommy Wars...Enough Already!!!

Breast or bottle? Cloth or disposable? Organic or conventional? These are just some of the many questions we as Moms ask ourselves. Raising a child is hard work and we all strive to be the best parents we can be. This brings me to a topic that I've noticed over the years with disturbing frequency, both online and in everyday life. 

Mommy Wars. Even if you aren't familiar with the term, you've probably fell victim to, or witnessed the malice of one of these battles. Simply put, a Mommy War involves one or more moms bitterly putting down the parenting choices of another. I think some arguments (but certainly not all) start off as a mom honestly trying to share the knowledge of her choices and what works for her. The problem arises when she pushes just a little too far. Hell hath no fury like a mommy whose parenting ability is called into question. This particular form of battle can be easily resolved. Then you have the OTHER type of battle. A mom with a holier-than-thou attitude who thinks that her choices are the only way and everyone else is wrong, wrong, WRONG! 

Its the latter of these two arguments that I see the most often, and that worries me. If you want to witness one of these brutal bloodbaths, just take a look over the myriad of "Mommy" Facebook pages or groups or online parenting forums. For example, I was witness to a particularly nasty war on a Facebook page that I follow a few weeks ago. The discussion was on how long to rear-face a child in the car. Most are aware that the AAP now recommends rear facing until two years of age. A mom had innocently stated that her son was a couple of months away from his second birthday and had outgrown his rear-facing seat. She had wanted to know if the other moms thought it would be okay to either go ahead and let him front face, or to keep him in the seat until he was two. Plenty of moms gave their polite opinions. Then came the war. One "Meanie Mommy" (what I like to call the instigators of these arguments) decided to interject and tell her that her ONLY option was to buy an ERF (extended rear-facing) carseat. (Now, I don't know if you've priced ERF's lately, but they generally run anywhere from $100-$400. Despite the cost, some backseats are not capable of fitting one of these monstrous seats. We know from experience.) Well, as many of us moms would say, the original poster commented that she could not afford the ERF. It happens. Meanie Mommy replied that anyone that ever even left their driveway with a child under 4 years old forward-facing was putting that child at risk of death, and that if parents could not afford to buy an ERF seat, then they couldn't afford to have children or raise a child. 

Of course, Meanie Mommy has a right to her opinion, we all do. Regardless of whether she is right or wrong, that is her opinion and how she raises her child, but when that opinion blatantly attacks and insults another mother's parenting abilities, then there is a problem. And its not just carseats. Feeding, working, staying at home, labor methods, all are subject to the Mommy War wrath. 

All of us mommies are just trying to do the absolute best that we can. Yet we all see other moms out and about whose children seem smarter or more well-behaved, more socialized, more anything than our own and suddenly we have to push that nagging voice of doubt back down. We've probably all had the same thought at one point or another, whether we're a first-time mom or or a 6 time veteran; "What is she doing so right that I am doing so wrong?" 

STOP IT!!!!!  

You aren't doing a damn thing wrong! You are doing what is best for your family in your specific set of circumstances, as is every other mom you see. We all have our own parenting challenges that we are facing, and just like our parenting styles they are all unique. 

So whether you vaccinate or not, circumcise or not, baby wear or not, or any other of the insane amount of choices you or another mommy make, embrace those differences. There is absolutely no need whatsoever to fight about it, online or in person. 

To the "Meanie Mommies" of the world: Please realize that you are not the only mother on Earth. There were billions before you and there will be billions after you. You are no better than anyone, nor are you any worse. You are a mom, just like the rest of us. Please learn to celebrate the beauty of our differences instead of using them to make others feel inferior. 

To the insecure Mamas out there that have ever had to question your skills: stop doubting yourselves! You're a mommy; you've made a beautiful miracle. You've earned your stripes. There isn't a soul on Earth that has the right to tell you otherwise or make you feel like any less of a mother! Keep your head held high. Let every smile, giggle, hug, kiss and "I love you" from your child(ren) be your reassurance that you are being the best mama you can be! 

Thursday, August 15, 2013

Barn Stars on a Budget

Little Monkey has decided that he wants his room decorated to look like an old barn or garage (country decor, basically). That's easy enough for Daddy Monkey and I to handle, since we both like that type of stuff as well.

When he said 'barn', of course my first thought was barn stars! I'm sure we've all seen them. They range in price from about $10 to over $60. I've been wanting some for my front porch for a while now. Little Monkey loves them as well, but they are made of metal. Sharp, pointy and metal is NOT a good combination in a 4-year old's room! So I made it my mission to create some of my own, that wouldn't maim him if they fell off the wall, and for the lowest cost possible. I succeeded! 

Yes, making them is a little more labor intensive (and messy) than running out to buy some, but well worth it in my opinion. They are lightweight and you can customize them to the exact size and color that you want. 

Budget Barn Stars

Materials:
Corrugated cardboard (for star pieces)
Thick cardstock or thin cardboard (for making template)
Scissors
Marker 
Hot glue and gun
Pliers
Pop tabs from soda can
Drywall joint compound or smooth paper
Fine grit sandpaper or cardboard nail file
Acrylic paints and brushes

Directions:

1. On cardstock or thin cardboard, draw an obtuse scalene triangle of desired size. (And you thought you'd never use that high school geometry class!), or in other words, a triangle with all 3 sides measuring different lengths and one angle that is greater than 90 degrees (see picture to left)


2. Using template, trace 5 triangles onto the corrugated cardboard (I used leftover shipping boxes that I had from people sending gifts to Baby Monkey), then flip the template to the reverse side and trace 5 more. This will be the body of the star.

3. Cut out all pieces and pair each up (1 right side and 1 reversed side), then glue the longest side together at a suitable angle (no specifics here, just go with what looks right). Make sure that the line of glue is towards the INSIDE of the star. Do this for all 5 pairs.
I hadn't glued it yet, but this is the inside portion.
4. To make star, glue all 5 pairs together on the longest sides into a star shape. 


5. Using pliers, bend top of pop tab slightly and glue into place on inside of one of the star points.

6. Using the drywall compound, spread it onto all seams on the outside of star. Don't be afraid to get it thick, we'll fix it in the next step. Let dry completely. If you don't want to go through that much trouble, you could also use smooth paper (like copier paper) to "wrap" the star and cover the seams. 
7. Take the sandpaper or file and smooth out the drywall compound. I personally used a small nail file and it worked wonderfully to get into all the tight areas. Dust off well. 

8. Paint in desired color, or for a more rustic appearance you can paint the seams a rust color, let dry, then paint with the main color and gently wipe off any areas that you want the "rust" to show as you go. Let dry and hang up by the pop tab. 
I used a dark brown with a gold overlay for the "rust".

And again, finished. I can't wait to get these hung on Little Monkey's wall, he absolutely loves them! 


Sunday, August 11, 2013

I'm Still Here, I Promise!

Just a quick update:

Domestic Mommies will be up and running again as soon as I get recovered from this C-Section. Baby Monkey made her way into the world via planned cesarean on July 29th, 2013, weighing 6 lbs, and was 19" long. She's definitely our little princess! Also, Little Monkey is beginning Preschool in about 3 weeks, so I'll have lots more time during the day then.

I'm working on lots of ideas for future posts, so bear with me for a little longer, and there will be plenty of good stuff to read and do soon!

Thursday, July 18, 2013

About Me (Mama Monkey)...answered by Little Monkey

This week has been stressful. Not a busy stressful, more of an 'Oh my God I'm never going to pop out Baby Monkey, I'm miserable, life sucks,' sort of stressful. My typical dessert of the week post even went to the wayside in the midst of my Tuesday being spent in total agony. (I made Rice Krispie Treats, for me, if that counts for anything though). 

So, fast forward to Thursday. I'm feeling pretty good, not so much in pain, and am just trying to take it easy and avoid over-doing it again, at the risk of feeling like total crap. Whilst trying (emphasis on TRYING) to sit on the couch and catch up on a couple of blogs, I came across a link over on Crappy Pictures. Honestly, if you haven't checked this blog out, you should. She is amazing! So the post was about interviewing your kids, and I am totally going to do this in the coming week or two. I'm quite certain that Little Monkey can come up with some...um...interesting answers. But as for now, I want to go with this post, an 'About Me' (Mama Monkey) as answered by Little Monkey. Yeah, this should be fun...

Here goes nothing:

About Me:

How old am I?
"I don't know." 
Smart answer, very smart answer.

What's my favorite things to do?
"I don't know...um...go to the grocery store, something, something, something." 
Well, possibly. At least it gives me a break. 

Why do I have this blog?
"So you can talk about all us monkeys!" 
Spot on!

What do I do to have fun? 
"I don't know...you tell me." 
Yep, typical Little Monkey answer. I swear he is the King of Avoidance. 


All told, at least he didn't give away all my secrets. I'm sure I could have came up with a few more questions, but he was more interested in asking me questions ("Mama when are you going to have 4 kids?" Never...the answer is never) and trying to grab Cutie-Toobie (our Betta) out of his tank. So there's that. I'm hoping he'll be a little more cooperative when it comes to his interview, because honestly, what 4 year old doesn't love to talk about themselves? And, maybe by next week's post, we'll have Baby Monkey here too! She can't stay in forever...I hope.

Tuesday, July 9, 2013

Dessert of the Week: Ferrero Rocher Brownies with Caramel Cream Cheese Frosting

So, if you haven't noticed, I tend to experiment a lot with recipes that pop up on my Facebook newsfeed or that I randomly find on Pinterest. This week's dessert is no different. All weekend I was trying to decide just what to post for the dessert this week. Luckily, this recipe popped across my newsfeed. AHA! There it was.  Mama Monkey is a HUGE fan of Ferrero Rocher. So much so that Santa doesn't get milk and cookies, he gets FR's and a bottle of wine on Christmas Eve (seriously).
No, they don't look spectacular...but man, they are AMAZING! 


The only way to describe this recipe is sinful. These, I do believe, hold the title of most decadent dessert I have ever made. Daddy Monkey said he'd take 2 of them and skip supper. That says a lot, considering in the summer, he's not huge on desserts or anything sweet because it tends to upset his stomach.

The original recipe (linking again, because I'm not posting it) called for these to be made in the mini-cupcake pans. Yeah, that wasn't happening. Mini-anything food in my house is a no-no. Daddy Monkey and Little Monkey like to eat. I really don't know how they don't ever gain weight.

Also, I fully intended on trying out the crock-pot caramel technique that made its popular rounds a month or so ago, but I just really wasn't feeling up to leaving the crock pot sitting on the counter for 8 hours while I was madly cleaning today. It would have just annoyed me, so I ended up using Nestle La Lechera. You can find it stocked with the international foods at the supermarket, and let me tell you, that stuff is like heaven in a can. This is the first time I've ever used it, but its going to be a staple item around here now!
Really, these are all the ingredients. Super simple! My kind of recipe.

When I say that this recipe is easy, its an understatement. Seriously, I think I had all the prep work done and the brownies in the oven in less than 10 minutes. When you use the muffin tins to make the brownies, make sure that you use liners or grease the pans EXTREMELY well. I lost 3 brownies to sticking.

I added 2 tbsp. of extra caramel to my frosting too (I used an entire block of cream cheese though, since I made the larger ones). The frosting is silky smooth, and I piped it on (something I never do) because the color and consistency was just too pretty to mess up by spreading. I can definitely see this being used on a cake in the future.
Little Monkey stole the bowl as soon as I snapped this pic! 

 I also used about 1/2 a tablespoon of caramel to top off each candy underneath the frosting. I am thoroughly convinced that there is no such thing as too much caramel. To each their own though.

No, they aren't quite as pretty as the original recipe, but what ever is when you're as busy as I am? These are certainly a re-make and will probably find their way to favorite family Christmas dessert status. As for now, I'm NOT sharing with anyone! The rest are mine until further notice!


Wednesday, July 3, 2013

Dessert of the Week--Banana Split Cake

So, I'm going to try something new. I'm going to try to post a new dessert recipe each week, as long as I have the time to do so. With Baby Monkey being so close to her arrival, things may be a little slow on here, but I'll do my best!

This recipe was shared with me by my stepmother. I know that she found it browsing online, but I can't find the exact one to save my life right now. So I'll post it in its entirety as it was given to me, then make a note at the bottom of the changes that I made, and the changes that I will make in the future.

Banana Split Cake

Ingredients: 
2 c. graham cracker crumbs
1 stick butter or margarine
3/4 c. granulated sugar
16 oz. cream cheese, softened
1 1/2 c. powdered sugar
4 large bananas, sliced
1 (15 oz.) can crushed pineapple, drained well
16 oz. whipped topping, thawed
16 oz. maraschino cherries, drained well
1/4 c. chopped peanuts

Directions:
In a large bowl, melt butter. With fork, mix well with granulated sugar and graham cracker crumbs. Press mixture into bottom of a 10X13 cake pan. Chill in refrigerator while preparing other ingredients.

Beat together cream cheese and powdered sugar on medium speed. Spread mixture onto crust. Layer with bananas and pineapple


Banana Layer
Pineapple Layer

Top banana and pineapple evenly with whipped topping. Top cake with cherries and peanuts. Chill until ready to serve. 


Now, for my thoughts and changes:
This cake was great! Daddy Monkey did NOT want to share, but hey, Mommies are sneaky, and well, since he goes to work pretty early, I managed to slip a piece through for breakfast yesterday. Normally, I don't like banana splits, but this hit all the same notes and the different textures throughout it worked together and it has a great flavor. That said, I didn't go exactly by the recipe. Our family loves pineapple, so I used a whole 20 oz. can, and we aren't so big on cherries, so I only used 10 oz, and halved each one (note: they WILL dye your fingers, horribly). We also aren't big peanut eaters so I used a small jar of the pecans in caramel ice cream topping. In the future, I think I would also use the French Vanilla whipped topping, to give it more of an ice-creamy flavor, and top with chopped fresh strawberries instead of the cherries. By all means though, it is very good the way it is. Give it a try, you won't be sorry!

Also, if anyone can find the source of this recipe (in its original form), I will be more than happy to post a link to it. Whoever came up with this, thank you for a new summertime hit in our house!

Saturday, June 29, 2013

Crochet...Or Why I do What I do...

This post is dedicated to my great-grandmother. Even though its been a decade since I've seen her face, heard her voice, or held her hand, not a day goes by that I don't think of her, miss her and love her.
Gladys M. Boatright--1911-2003

I catch a lot of flack about the fact that I am only 24 and I crochet. Honestly, people think its absolutely hilarious that I have the patience to sit down and do something so tedious and not complain about the fact that I look like an elderly woman in the process. Crochet isn't something that is generally associated with people my age. And when it is, its usually being laughed at because it has been a holiday gift from a grandmother. Which brings me to why I do it.

I lived with my grandmother and my great-grandmother, for a large part of my childhood. I can remember everyday, my great-grandmother, well into her 80's, laying in bed, just crocheting away. There would be skeins of yard spread everywhere, a pattern that had been moved and read to the point of being wrinkled and the 'squeak' of yarn being pulled over the hook. That was one of the only things I knew was constant in my life. I knew that whenever I wanted to see her, I could go into her room and she'd clear off a spot on the bed for me to sit and watch.

My Great-Grandmother--circa 1920-30


I tried to learn a few times, but, being young, I never quite got the hang of it. My mother did, to a degree, but I've only seen her make one item before putting it away.

Sadly, Grandma passed on in 2003. With her death, I had no one left in my family to teach me to create the beautiful items that she used to make. No one had the knowledge of the different stitches, how to keep the yarn tension just right, how to call out my mistakes and show me how to fix them. I gave up on ever learning. I didn't know anyone else that had the skill, patience, or joy to show me how.

After I got married in 2006, my step-mother-in-law lost her job at the restaurant she was working at. While she was in the process of looking for another line of work, she picked up a few different craft items to try her hand at. After she went back to work, she passed the crochet items she had bought on to me. There was one skein of bubblegum pink yarn and a starter kit of hooks, with an instructional book. I gave it a try, but reading something in a book and making your hands do what is pictured is two different things altogether, so I put it in storage and didn't think about it again.

Last year, my husband and I were cleaning out our shed, and I came across my crochet hooks and yarn, but never found the book. This time I was determined to learn, determined to make sure that my great-grandmother's skill wasn't buried away with her forever. I was like a madwoman, furiously searching for anything online to teach me. I finally came across this series of videos. Finally, something just 'clicked' in my brain. I understood it, but more so, I felt a connection to my grandmother that I missed out on while she was alive. I was inspired and I was happy. After spending insane amounts of money on different crafts, just to toss them to the wayside when they bored me, I had found my forte. I still couldn't read a pattern though. All the abbreviations boggled my mind. Finally, I found a pattern with as many different basic stitch abbreviations that I could. I spent an entire afternoon writing out the pattern, without abbreviations, by hand. After that, I had the abbreviations memorized, and I still maintain that is the best way to figure out how to read crochet patterns.

At first I started with simple things, a cloth here, a few rows of practice stitches there. Then I discovered amigurumi (if you want to know more about it click here). I was, pardon the pun, hooked. For the next year, I created lots and lots of stuffed animals, and still do. I have friends constantly trading/buying them from me, and my confidence in my work continues to grow, especially now that I have learned how to create my own patterns. But, still, something didn't feel quite right. Grandma never made stuffies, she made beautiful blankets and pillows. I had yet to commit to such a large project.

When I found out I was pregnant with Baby Monkey, I knew I had to make something special for my little girl. Something that connected the generations of my family. I had made a quilt for Little Monkey out of his baby clothes, but this was a different feeling. Like I HAD to make it. Weird, I know.

After searching online for weeks, I finally found the perfect pattern for a blanket. And it was big enough for her to keep her blanket for as long as she wants without outgrowing it. So, now, here I sit, crocheting my heart out and my fingers to the bone to finish her blanket before she arrives, which could be anytime in the next 3 weeks. I KNOW I'll get it finished, but I will admit its challenging. I wouldn't have it any other way though.
One of 30 squares I'm making. Its a lot, but so, so worth it! 


Today, I had a friend over, who had been interested in learning to crochet. I was self-taught, so I doubted my ability to teach her. I did my best though, and I am proud to say that she picked it up very quickly. We worked through a few different stitches and chaining, turning, all the basics. She made the cutest little apron for her daughter's dolls. I am so happy to know that I've been able to give a part of my knowledge to someone else, to see them smile and learn a new skill, and especially for being able to teach someone my age something that is so out of the norm for our generation.

Adorable, and she did awesome for never having picked up a hook before.


I sincerely hope that I've made Grandma smile. I hope that even though she may not be here any longer, that where ever she is, I've made her proud, knowing that at least one person in my family was determined to pass on her wisdom and skill, that she learned from her mother as well. Yes, to most it might just be a silly craft project, but to me, its a part of who I am and a part of the women in my family. A common bond that we all share. And it is my sincerest hope that one day, I'll be able to teach my daughter the same; that one day, I'll be that elderly woman, in bed, skeins of yarn all around, scooting them out of the way to make room for my grandaughter to sit with me as well.


Tuesday, June 25, 2013

Strawberry Shortcake Roll

Have you ever eaten a Little Debbie Strawberry Shortcake? They are cheap, flavorful, and I've seen my husband literally put away an entire box of them in one sitting. I may not like them as much as he does, but every now and then I get to wanting one.

Seriously, if you haven't already, try these. They really are good! 


I was laying in bed the other night, and I had a craving for one at oh, about 2 AM (thank you pregnancy weirdness). Of course, I'm not getting up to go all the way into town to get one, and asking Daddy Monkey would have resulted in hysterical laughter right before he said 'No', and went right back to snoring. So, I made it my mission to recreate a recipe for them.

Google didn't yield me a whole lot of options, and all of them that I did find just seemed way too dense, the cream too heavy, and the strawberry filling just wasn't quite right. That's one of the things I really love about the store bought snack cakes, they have a lighter texture and the strawberry filling has a good flavor.

Pumpkin Roll is a big hit in my house during the holidays, so I figured that I could modify the recipe I use for it and come up with something appropriate for summertime. I don't claim to be a great baker, (I hate measuring things), but Little Monkey and Daddy Monkey seem to love it all, so I won't complain. Here's the recipe that I came up with, its not quite the same, and I need to figure out how to get the cake a little less dense, but flavor-wise, it was far superior to the store bought cakes. I also decided to leave a few chunks in the strawberry filling at the last minute, and I'm very glad that I did. It gave it a nice texture. And yes, it's messy looking. Like I said, NOT the greatest baker in the world.

Strawberry Shortcake Roll (Makes 2)

Ingredients: 

*Roll*
-6 eggs
-2 c. granulated sugar
-2/3 c. water
-2 tsp. vanilla
-1/2 tsp. salt
-2 tsp. baking powder
-1 1/2 c. all-purpose flour
-powdered sugar

*Cream Filling*
-(1) 8 oz. block cream cheese (softened)
-(1) 7 oz. container marshmallow fluff

*Strawberry Filling*
-1 quart strawberries (fresh or frozen, chopped or pureed. If frozen,  thaw and drain well)
-(1) 14.5 oz. container strawberry glaze

Directions:
1. Preheat oven to 375F. Spray (2) 10.5 in. X 15.5 in. jelly roll pan with non-stick cooking spray and line with parchment or waxed paper. Spray a light coating of non-stick on the paper surface as well. Set aside.

2. In a large mixing bowl, beat eggs on high speed for 5 minutes. 
This is how the eggs should look

3. Gradually add in sugar on low speed. Add in water, vanilla, salt and baking powder. Add in flour, gradually. 

4. Pour batter into prepared baking pans. Bake for 12-15 minutes (My oven took 13).

5. While cake is baking prepare the cream filling and strawberry filling.

6. For cream filling--In medium bowl beat together cream cheese and marshmallow fluff on medium speed until smooth. Set aside. 

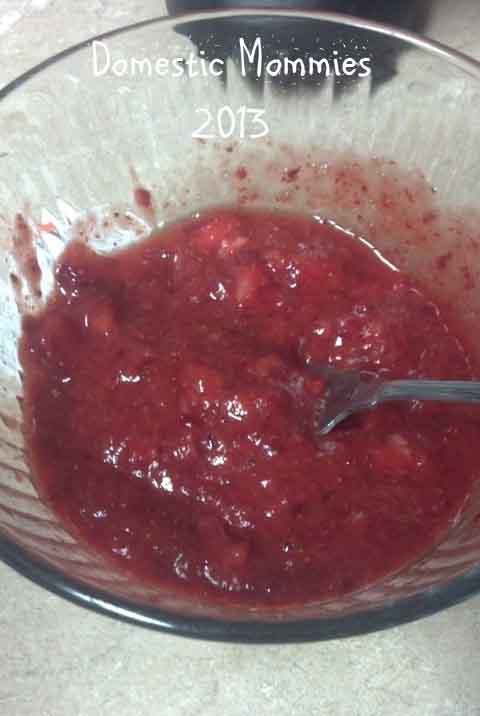
7. For strawberry filling--place strawberries in food processor (or in my case, blender. My food processor lid met an untimely death this morning, thanks to an angry 4 year old) and chop as finely as desired. Mix with strawberry glaze and set aside. 
You can see how I left a few larger pieces in the mixture. I'm very glad that I did. 


8. When cake is done, remove from oven and set aside. Place a kitchen towel on a clean surface. Sprinkle lightly with powdered sugar. Carefully invert cake onto towel. Gently remove paper from cake and sprinkle top with powdered sugar. Roll together cake and towel, and place in freezer for 10-15 minutes or until just cooled. 

9. Remove from freezer and gently unroll cake

10. Spread cake with 1/2 of cream filling, followed with 1/3-1/2 of strawberry filling. Roll up gently. It will be messy. Sprinkle top of cake with powdered sugar.

11. Chill in refrigerator for 20-30 minutes or until ready to serve. Store, tightly covered, in refrigerator. 


DIY Colorful Chandelier Mobile

While browsing Pinterest for baby ideas, I came across this tutorial for a cute baby mobile. I loved the idea, but it didn't quite fit perfectly with what I've got going on in Baby Monkey's nursery. I knew I wanted to use that concept, but I wanted something a little more ornate, yet natural. Here's what I came up with, and for less than $10:


Yes, I know. This picture sucks, but I can only reach so far over the crib with a beach ball for a belly. 

DIY Colorful Chandelier Mobile

What You'll Need:


  • Grapevine wreath
  • Paint chips (For the large flower in the center, I used 4 Behr chips from Home Depot that were petal-shaped and 4 very large rectangular paint chips that I can't remember the brand on)
  • Tacky Glue or Hot Glue (I used Tacky Glue since Little Monkey had somehow made my glue gun vanish into thin air. It happens. A lot.)
  • Cotton thread in any color (I used white)
  • Scissors or large round hole punch
  • If using scissors--circle template to trace. I used a quarter, nickel and dime for uniformity and to give the circles a cascading look. 


Directions:
(I apologize in advance for the lack of pictures of the creation process.) 
  1. Begin by tracing out your desired number of circles (if using scissors), remembering for each colored circle, to trace two of each, or if using a punch, punching out two of each. 
  2. Lay out 1 set of circles in the desired pattern for the mobile. 
  3. Cut a length of cotton string 8-12 inches long for each line of chip circles. I varied the lengths of string to add variety. 
  4. Tie a knot at the bottom of each piece of thread and a knot at each point on the string where a chip circle will go. 
  5. Brush glue onto the back of a chip circle. Press the string onto the circle, then press the matching circle on top. Repeat for each circle on mobile. 
To make center flower:
  1. Begin by taking one of the large petal shaped chips and tracing it, in reverse, on the 4 large rectangular paint chips so that when cut out and glued, all 8 petals align correctly. 
  2. Cut 2 fairly large circles (half dollar sized) out of desired center color.
  3. Cut a length of cotton thread, (desired length, from ceiling to bottom of flower) and tie a knot in the end.
  4. Glue all 8 petals together then brush glue on the back of one of the center circles. 
  5. Arrange flower petals and knot on thread on center chip circle, brush all with glue, then press down the second center chip circle. 

Assembly:
  1. After glue has dried on all chips, cut string flush with bottom circle. Take the remaining end of thread and tie through a branch on the wreath. Repeat for all strings.
  2. Cut 4 pieces of string and tie evenly around the top of wreath to make the part that will hang from the ceiling  You may want to use a thicker thread to do this, or double the thread. Tie all hanging threads together with a sturdy knot or loop. Tie the flower string onto/into this knot as well. 
  3. Hang well above baby's reach. 


Monday, June 24, 2013

Off Hiatus!

So, yeah, its been a long, long time since I've posted anything. I have good reason though. Being pregnant tends to take up all my available time. Between doctors appointments, nursery decor, painting the monkeys bedrooms, redecorating the living room, getting Little Monkey ready to (possibly) start school this year, etc., I've been totally overwhelmed!

Fear not though! I plan to get back on a normal posting schedule very soon, and I've been stockpiling material to blog about for almost a year now. In another month, my world will be a flurry of diapers and 4 1/2 year old antics, so I'm quite certain that my 2 little monkeys will be keeping me on my toes and giving me new material to write about!

Stay tuned, I haven't abandoned ship yet ;)

Monday, August 20, 2012

Chicken "Stroganoff"

Ingredients

4 tbsp. butter or margarine (divided)
1/2 tsp. onion powder
1/4 tsp. white pepper
3/4 tsp. salt
1/4 tsp. garlic powder
1/4 tsp. dried oregano
1/4 tsp. dried basil
splash of Worcestershire sauce 
1 lb. shredded or cubed chicken
1/2-1 c. (your preference) sliced mushrooms
1 tbsp. + 1 tsp. all-purpose flour
1 c. chicken broth
3/4 c. (6 oz) sour cream
8 oz. egg noodles

Directions

In a large pot, prepare noodles according to package directions. Drain.

In large skillet, over medium-low heat, melt 3 tbsp. of butter. Add in onion powder, pepper, salt, garlic, oregano, basil and Worcestershire. Place chicken in pan. Fry until browned (if not using precooked chicken, cook thoroughly). Remove chicken from pan. Add in remaining 1 tbsp. of butter and let melt. Add in flour, cook, while stirring for one minute. Add in mushrooms and 1/2 of chicken broth. Stir until mixture begins to thicken. Add in remaining chicken broth. Allow to thicken slightly, while bringing to a low boil. Reduce heat, and add chicken back to pan. Cover and cook for 5-7 minutes, stirring occasionally. Add in sour cream. Stir well.

In large serving bowl, mix drained noodles and sauce. Makes 4 servings.

Thursday, August 16, 2012

Tuna Pop-Overs

I found the recipe for the pop-over breads below in a box of recipe cards that my Mom gave me. The brand on the recipes says that they are by 'Easy Everyday Cooking' but that's the only copyright info that I can find. If anyone knows more, let me know and I will be much obliged to add credit where its due.

I do believe that these pop-overs could be very versatile, and since they are so easy to make, I may have to try a few things with them (I'm thinking chicken salad, or perhaps a chili/cheese combo). The only problem that I found with mine was that the center was a little chewier than I would have liked them to be. That could have been because my oven is not the greatest, or perhaps I didn't bake them quite long enough. These were a huge hit with my 3 year old son for lunch today, so at least I know I've found something else to add to our quick lunch menu. Enjoy!

Sorry for the poor quality of the photo, I have a crap phone for the next few months, and can't seem to find my charger for my good camera....sigh.....

Ingredients

(Pop-Overs)
3 eggs
1 c. skim milk (I used whole, its what I had)
1 c. all-purpose flour
1/2 tsp. salt
3 tbsp. butter--melted

(Tuna Salad)
2 (5 oz.) cans chunk light tuna in water
1/2 tsp. salt
1/4 tsp. onion powder
1/4 tsp. white or black pepper (I prefer white)
2 tbsp. sweet relish
2 tbsp. mayonnaise 

Directions:

  1. Preheat oven to 475F. Grease 12 muffin cups. Combine eggs, milk, flour and salt in a large bowl. Beat with an electric mixer, set at medium speed for 1 1/2 minutes.
  2. Add melted butter to bowl. Beat for 30 seconds longer.
  3. Fill muffin cups halfway with batter. 
  4. Bake pop-overs for 10 minutes. Reduce oven to 350F, bake for 15 minutes longer. Prick tops of popovers gently with a fork to release steam. f
  5. While pop-overs are baking, combine all ingredients for tuna salad in a medium bowl. Refrigerate until needed. 
  6. When pop-overs are finished, add a tablespoon or two of tuna salad to the top of each pop-over and serve immediately. 

Saturday, August 11, 2012

DIY Wine Glass Candleholders

As I was browsing on Pinterest last night, I came across these gorgeous candle holders. I knew I wanted to make them, but I didn't want them just for the Autumn season, I wanted to be able to use them year round. Gosh knows I have enough pumpkin decor! So, I set out this morning to make these happen. One stop by Goodwill and I was set. I picked up 3 different stemmed glasses for only $0.49 a piece. Jackpot!
And yes, I did set the pic up with an Autumn vibe, because I wanted to make doubly sure they went well with some of my other decor.


What You'll Need:

-Mixed shape/design clear wine glasses
-Acrylic paint (yes I know there are watercolors shown in the pic, but I changed my mind at the last second)
Here's the colors that I used:
  • Linen--Folk Art
  • Metallic Peridot--Folk Art
  • Metallic Antique Gold--Folk Art
  • Burnt Umber--Folk Art
  • Metallic Pearl White--Folk Art
  • Toffee--Apple Barrel Colors
  • Orange--Apple Barrel Colors
  • Christmas Green--Apple Barrel Colors
  • Berry Red--Apple Barrel Colors
  • Pineapple--Apple Barrel Colors


Yes, there is a lot of paint mixing, but its fun! 
-Assorted size paint brushes (softer bristles work best)
-Optional: Tacky Glue, Water
-Tealight Candles


Directions:

  1. Wash and dry glasses thoroughly.
  2. Paint the interior of each glass with Metallic Antique Gold. It will be a pale color (see photo on right), but will dry to a beautiful finish. If you are impatient like me, go ahead and use a blow dryer to speed up the process. I used mine on the lowest setting, and using cool air. It was all dry in about a minute and a half.  
  3. Mix acrylics to desired colors. Paint the insides of the glasses, over the gold. Let dry (or use the blow dryer again). Also, if you decide that you don't like the color or brushstrokes, the paint washes off simply with water. 
  4. Paint the stems of the glasses with the Metallic Peridot. I did not paint the area of the stem that the candle sits on. Once again, let dry. 
  5. (Optional) If you would like a matte/frosted finish, mix equal parts Tacky Glue and water. For a frosted finish, add a small amount of white paint to the glue/water. Paint the mixture as evenly as possible onto the outside of the glass. You may want to test the effect on another glass before painting the final product. This also washes off easily with water. 

Happy Crafting! 


Friday, August 10, 2012

Quick and Easy Garlic Bread

I originally made this to go with Ham and Onion Alfredo, but now that I think about it, this recipe could be adapted to so many more uses. I think it would lend itself quite well to a cinnamon/brown sugar/honey mix as as well. I'll have to give that a try in the next few days.

Ingredients:

1 1/4 c. self-rising flour
2 tsp. sugar
1/2 tsp. garlic powder (divided)
1/2 tsp. dried basil (divided)
1/2 tsp. dried oregano (divided)
1/8 tsp. salt
2/3 c. milk
3 tbsp. butter or margarine (melted)
Parmesan cheese (optional)
Non-stick cooking spray

Directions:

Preheat oven to 450F.
In a medium-sized bowl, combine flour, sugar, salt, and all but a pinch or two of basil, oregano and garlic. Mix thoroughly. Gradually add in milk, it may take more or less than what is listed. The dough should be pliable, but not too sticky. Lightly flour worksurface, turn dough out, knead and roll out. Dough can be cut into biscuits/sticks/whatever form desired, or twisted into sticks/small loaf. Place bread on baking sheet coated in non-stick spray. Add remaining herbs/seasonings to melted butter. Brush butter onto bread, making sure to coat well. Sprinkle tops with parmesan cheese if desired. 
Bake for 12 minutes, then turn on broiler for 1-2 minutes, keeping a careful watch that tops do not burn.